Are you looking for a secure way to access your Raspberry Pi remotely? SSH tunneling is the perfect solution for safeguarding your data while managing your device from anywhere in the world. With the growing popularity of Raspberry Pi for various projects, understanding how to set up SSH tunneling is essential for ensuring secure communication. Whether you're a hobbyist, developer, or IT professional, this guide will walk you through everything you need to know about Raspberry Pi SSH tunneling.
SSH tunneling allows you to create an encrypted connection between your local machine and your Raspberry Pi. This ensures that all data transmitted between the two devices is secure, protecting it from potential threats like man-in-the-middle attacks. In today’s digital age, where cybersecurity is a top priority, mastering SSH tunneling is a valuable skill.
In this article, we’ll explore the concept of SSH tunneling, how it works, and why it’s crucial for Raspberry Pi users. We’ll also provide step-by-step instructions for setting up SSH tunneling on your Raspberry Pi, along with tips for troubleshooting and optimizing your setup. By the end of this guide, you’ll have a solid understanding of SSH tunneling and how to implement it effectively.
Read also:Unveiling The Controversy A Comprehensive Look At Miaz Vs Girthmaster Video
Table of Contents
- What is SSH Tunneling?
- Why Use SSH Tunneling on Raspberry Pi?
- How SSH Tunneling Works
- Prerequisites for Setting Up SSH Tunneling
- Step-by-Step Guide to Setting Up SSH Tunneling
- Advanced Configurations for SSH Tunneling
- Troubleshooting Common Issues
- Security Best Practices for SSH Tunneling
- Use Cases for Raspberry Pi SSH Tunneling
- Conclusion
What is SSH Tunneling?
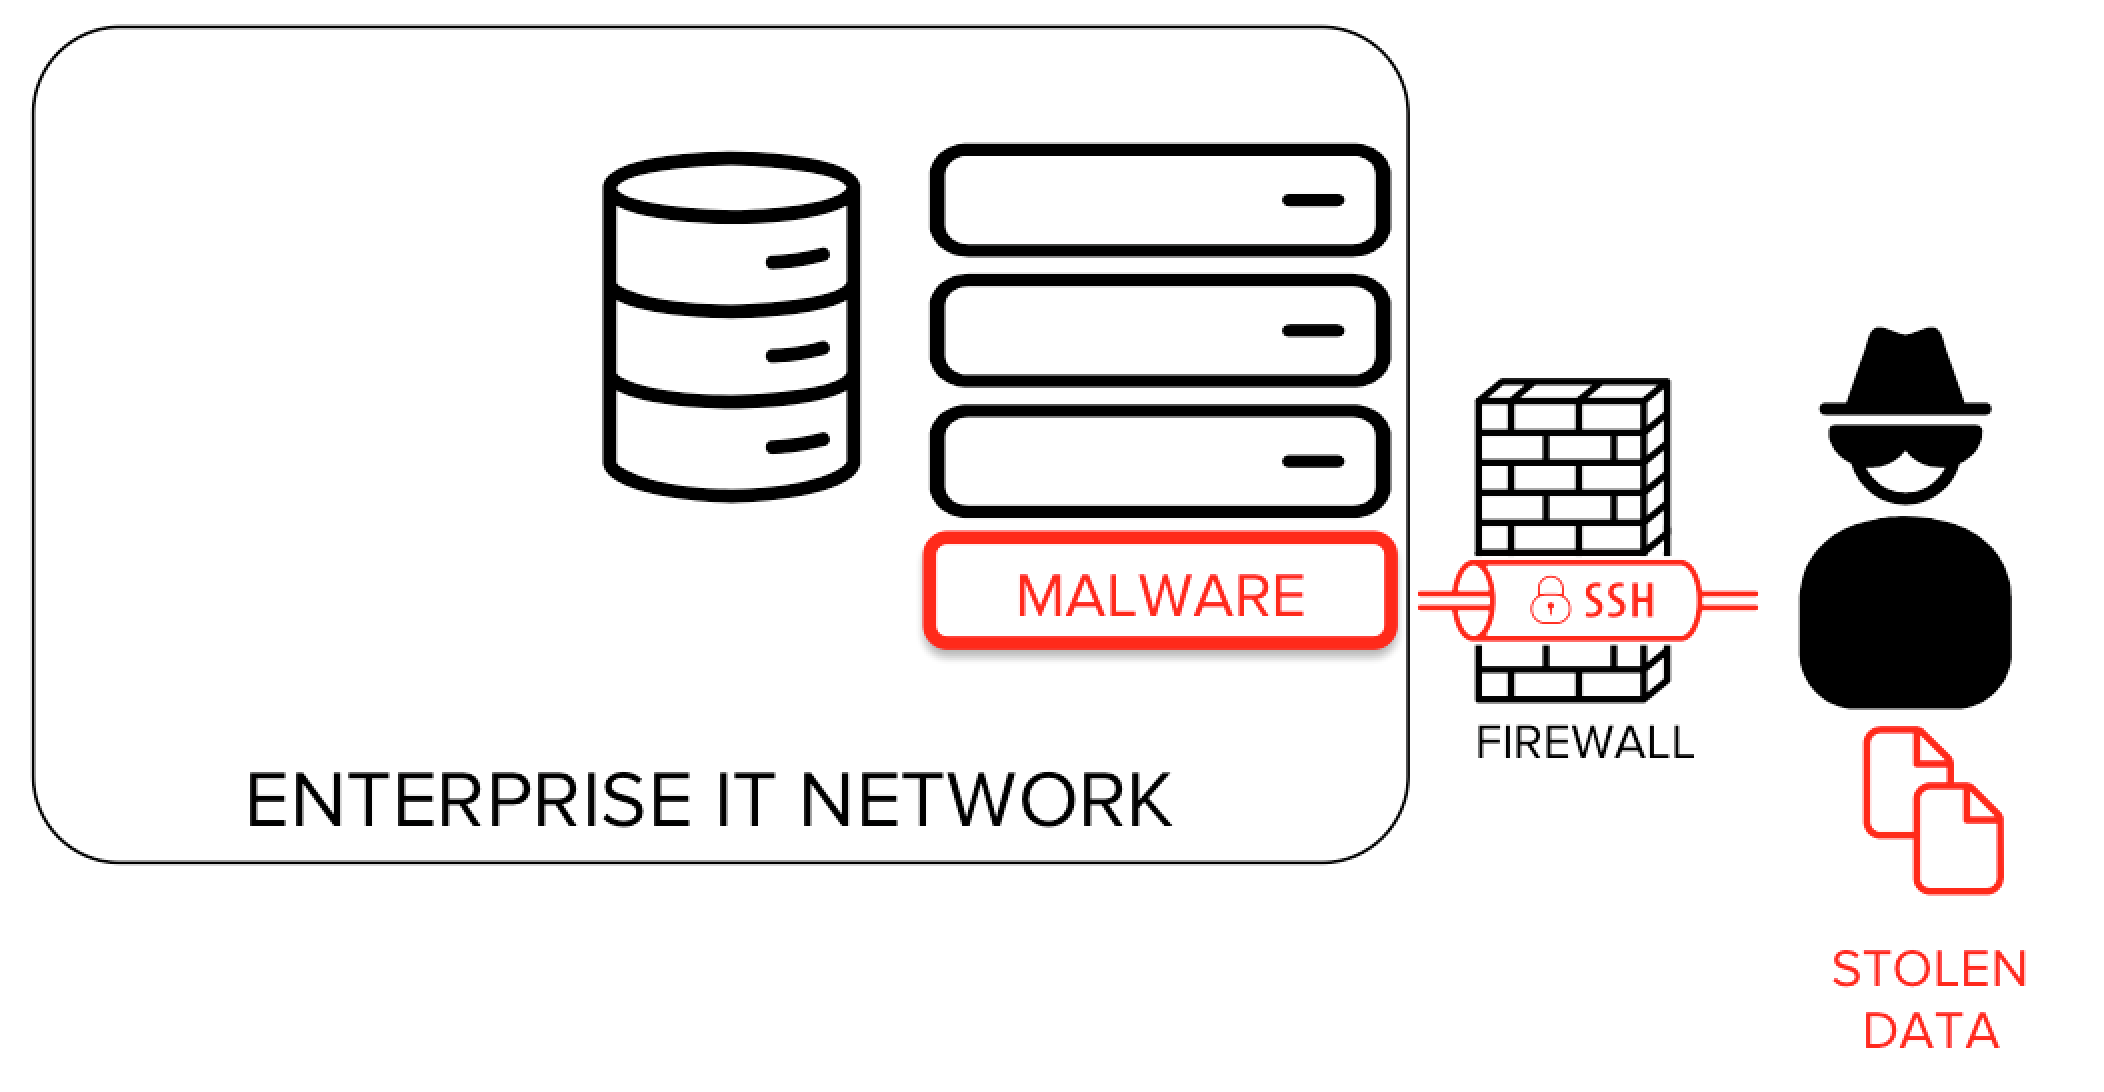
SSH tunneling, also known as SSH port forwarding, is a method of creating a secure connection between two devices over an unsecured network. It allows you to route traffic through an encrypted SSH connection, ensuring that sensitive data remains protected from unauthorized access. SSH tunneling is widely used for remote access, secure file transfers, and bypassing network restrictions.
There are three main types of SSH tunneling:
- Local Port Forwarding: This type of tunneling forwards traffic from a local port on your machine to a remote server via the SSH connection.
- Remote Port Forwarding: In this setup, traffic from a remote server is forwarded to your local machine through the SSH tunnel.
- Dynamic Port Forwarding: This method allows you to create a SOCKS proxy server, enabling you to route traffic dynamically through the SSH tunnel.
SSH tunneling is particularly useful for Raspberry Pi users who want to securely access their devices over the internet. By leveraging SSH tunneling, you can protect your data and ensure that your Raspberry Pi remains secure, even when accessed remotely.
Why Use SSH Tunneling on Raspberry Pi?
Raspberry Pi is a versatile device used for a wide range of applications, from home automation to server hosting. However, its small size and affordability also make it a potential target for cyberattacks. SSH tunneling provides an additional layer of security, making it an essential tool for Raspberry Pi users.
Here are some reasons why you should use SSH tunneling on your Raspberry Pi:
- Enhanced Security: SSH tunneling encrypts all data transmitted between your local machine and Raspberry Pi, protecting it from eavesdropping and tampering.
- Remote Access: With SSH tunneling, you can securely access your Raspberry Pi from anywhere in the world, making it ideal for remote management.
- Bypassing Firewalls: SSH tunneling allows you to bypass firewalls and network restrictions, enabling you to access services that might otherwise be blocked.
- Privacy Protection: By routing your traffic through an SSH tunnel, you can protect your online activities from prying eyes, such as ISPs or malicious actors.
Whether you’re using your Raspberry Pi for personal projects or professional purposes, SSH tunneling is a powerful tool that enhances both security and functionality.
Read also:Exploring The World Of Hdmovieshub 4u Your Ultimate Guide To Streaming
How SSH Tunneling Works
SSH tunneling works by creating an encrypted connection between your local machine and a remote server, in this case, your Raspberry Pi. This connection acts as a secure "tunnel" through which data can be transmitted without being intercepted by unauthorized parties.
Here’s a breakdown of how SSH tunneling works:
- Initiating the Connection: The process begins when you establish an SSH connection to your Raspberry Pi using an SSH client, such as OpenSSH or PuTTY.
- Encrypting the Data: Once the connection is established, all data transmitted between your local machine and Raspberry Pi is encrypted using the SSH protocol.
- Forwarding Traffic: Depending on the type of tunneling you’re using, traffic is forwarded from a local or remote port through the SSH tunnel to its destination.
- Decrypting the Data: When the data reaches its destination, it is decrypted and processed as usual.
This process ensures that your data remains secure and private, even when transmitted over unsecured networks like the internet.
Prerequisites for Setting Up SSH Tunneling
Before you can set up SSH tunneling on your Raspberry Pi, there are a few prerequisites you need to fulfill:
- Raspberry Pi with SSH Enabled: Ensure that SSH is enabled on your Raspberry Pi. You can enable it by running the
sudo raspi-configcommand and navigating to the SSH settings. - Static IP Address: Assign a static IP address to your Raspberry Pi to ensure consistent connectivity.
- SSH Client: Install an SSH client on your local machine. Popular options include OpenSSH (for Linux and macOS) and PuTTY (for Windows).
- Internet Connection: Both your Raspberry Pi and local machine must have access to the internet.
By ensuring these prerequisites are met, you’ll be ready to proceed with setting up SSH tunneling on your Raspberry Pi.
Step-by-Step Guide to Setting Up SSH Tunneling
Setting up SSH tunneling on your Raspberry Pi is a straightforward process. Follow these steps to configure it successfully:
1. Enable SSH on Raspberry Pi
First, ensure that SSH is enabled on your Raspberry Pi. You can do this by running the following command:
sudo raspi-configNavigate to the "Interfacing Options" menu and select "SSH." Choose "Yes" to enable it.
2. Connect to Raspberry Pi via SSH
Use your SSH client to connect to your Raspberry Pi. For example, if you’re using OpenSSH, run the following command:
ssh pi@your_raspberry_pi_ipReplace your_raspberry_pi_ip with the actual IP address of your Raspberry Pi.
3. Set Up Local Port Forwarding
To set up local port forwarding, use the following command:
ssh -L local_port:remote_host:remote_port pi@your_raspberry_pi_ipThis command forwards traffic from local_port on your machine to remote_host:remote_port via the SSH tunnel.
4. Set Up Remote Port Forwarding
For remote port forwarding, use the following command:
ssh -R remote_port:local_host:local_port pi@your_raspberry_pi_ipThis command forwards traffic from remote_port on the Raspberry Pi to local_host:local_port on your machine.
5. Test the Connection
Once the tunnel is set up, test the connection to ensure it’s working correctly. You can do this by accessing the forwarded port from your browser or using a network tool like curl.
Advanced Configurations for SSH Tunneling
For users looking to optimize their SSH tunneling setup, there are several advanced configurations you can explore:
- Dynamic Port Forwarding: Use the
-Doption to create a SOCKS proxy server for dynamic traffic routing. - SSH Keys for Authentication: Set up SSH key-based authentication to enhance security and eliminate the need for passwords.
- SSH Config File: Use the SSH config file to simplify complex commands and manage multiple SSH connections.
These configurations can help you tailor your SSH tunneling setup to meet your specific needs.
Troubleshooting Common Issues
While setting up SSH tunneling, you may encounter some common issues. Here are a few troubleshooting tips:
- Connection Refused: Ensure that SSH is enabled on your Raspberry Pi and that the correct IP address is used.
- Port Conflicts: Verify that the ports you’re using are not already in use by another service.
- Firewall Restrictions: Check your firewall settings to ensure that the necessary ports are open.
If you’re still experiencing issues, consult the Raspberry Pi documentation or seek help from online forums.
Security Best Practices for SSH Tunneling
To maximize the security of your SSH tunneling setup, follow these best practices:
- Use Strong Passwords: If you’re not using SSH keys, ensure that your passwords are strong and unique.
- Disable Root Login: Prevent unauthorized access by disabling root login on your Raspberry Pi.
- Update Regularly: Keep your Raspberry Pi’s operating system and software up to date to patch any vulnerabilities.
By adhering to these practices, you can significantly reduce the risk of security breaches.
Use Cases for Raspberry Pi SSH Tunneling
SSH tunneling on Raspberry Pi has a wide range of applications, including:
- Remote Server Management: Securely manage your Raspberry Pi-based server from anywhere.
- Home Automation: Access your smart home devices securely over the internet.
- Secure File Transfers: Transfer files between your local machine and Raspberry Pi without exposing them to potential threats.
These use cases demonstrate the versatility and importance of SSH tunneling for Raspberry Pi users.
Conclusion
SSH tunneling is a powerful tool that enhances the security and functionality of your Raspberry Pi. By following the steps outlined in this guide, you can set up SSH tunneling to securely access your device and protect your data from potential threats. Whether you’re a beginner or an experienced user, mastering SSH tunneling is a valuable skill that can benefit your Raspberry Pi projects.
We hope this guide has provided you with the knowledge and tools you need to implement SSH tunneling effectively. If you found this article helpful, feel free to leave a comment, share it with others, or explore more articles on our site. Your feedback is invaluable to us, and we’re always here to help you succeed with your Raspberry Pi projects.